How to Proof a Paperback for Free & Save Time on CreateSpace


The Mirage on the Brink of Oblivion paperback on tableHave you ever ordered a paperback proof from CreateSpace?

Many authors do this, and if it’s your first book, it’s a smart thing to do.

After all, you get to see if everything looks right before you put your book on sale, right?

There’s only one problem: on the last page, it’ll say PROOF in huge letters, effectively making it unsellable, even if it’s exactly what you want for your final product.

In short, if you’re reasonably sure that your proof will look like what you want to sell, there’s no reason to order a proof. Just order a final copy directly from CreateSpace. You can totally skip this step, which means you’ll actually be able to sell what you may have considered “test” copies before.

Here’s how:

  1. Upload your final interior PDF to CreateSpace
  2. Submit the book for review
  3. Once CS approves it, log back in, go to your book, and under “Review”, choose “File Review”
  4. Choose “Digital Proof.” There’s an option to download a PDF of the proof. (This is the same PDF that CS will print)
  5. Review the PDF carefully to make sure it’s exactly what you want to print
  6. Back at the “File Review” page, click “Approve”
  7. Now go to “Distribute” and click “Channels”
  8. Turn off every channel except CreateSpace. (You don’t want people ordering your book off of Amazon until you’re ready. This is key.)
  9. Click “Save” and then “Return to Member Dashboard”
  10. Under the list of paperbacks you offer, click “Order Copies” to the far right of the book you’re working on
  11. Go through the check out process. If you’re feeling especially confident, you may want to get 2 copies since it’s more economical when you add in shipping.
  12. When your book arrives in the mail, inspect it, making notes of anything you’d like to change. If there isn’t anything wrong with it, sell it! (If there is, use your own judgment, of course. Selling a subpar paperback will reflect on you as an author.)

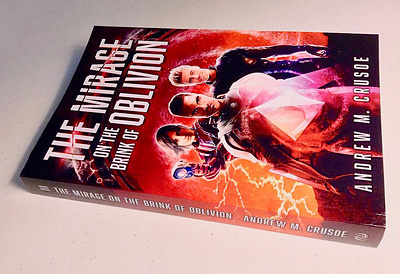
These are the exact steps I followed when I ordered the test copy of the upcoming “The Mirage on the Brink of Oblivion” paperback. I’d used its basic template before and was confident that I’d nailed the design elements. And you know what, when the book arrived in the mail, it was just as I’d hoped.

The best part is, if I want to sell that copy, I can. There’s no ugly printing of the word PROOF on the last page; it looks beautiful. By doing this, I basically get to proof my book for free.

And when you’re ready to release your paperback, go back to the “Channels” area under “distribute” and turn on as many channels as you can. Then your book will show up in Amazon.

To clarify, you may not want to try this technique if this is your first paperback, but if you feel comfortable with the process, do it. In my experience, approved books cost the same as proof copies, so what do you have to lose? Just remember to turn off the other sales channels, otherwise you may be selling your paperback on Amazon before you’re ready! But as long as you follow the steps above, you’ll never have useless “proof” paperbacks lying around ever again.

Does this help you or give you new ideas? I appreciate on your feedback! Please comment below, or shoot me a message @hellocrusoe!


How to Do a Travel Inventory Post-Mortem: My Transparent Travel Inventory


A long time ago, in an internet far, far away, I was a travel blogger.

Yes, it’s true!

Back then, one of my popular articles was called “How to Design Your Own Travel Inventory,” and in light of my recent travels, I’d like to give you an update on what I’ve learned since I wrote that article, over seven years ago.

Aspirational vs. Real

Honest Packing ListIf there’s one thing the last 7 years have taught me, it’s that the old adage is true: the more things you own, the more things own you, and this is an order of magnitude more intense when you’re travelling.

Now, there are packing lists, and there are Packing Lists.

Half of the packing lists I see are merely aspirational. Some travellers make such ambitious lists, aspiring to only take 20 things with them… but end up bringing six sweaters.

Lists like that are useless because they aren’t a true reflection of life. They aren’t something you can look at and say, “Oh I see, I hadn’t even realized I wouldn’t need that.” Honestly, aspirations are NOT what make a good trip, positive action is.

So in light of this, I’m doing something I haven’t done before. While in Wisconsin, I wrote down everything I had with me (pictured here). And for the first time, I’m sharing, with utter transparency, exactly what I brought on my month-long journey. I’m pulling no punches here, in the hope that seeing what I actually brought would give you some ideas. I believe this speaks louder than any advice I could give you.

And even after all these years of practice, I still felt like I brought too much. But I’ll let you be the judge:

My Honest Packing List

48L Osprey Kestrel Pack
— Over 7 years old & still seems new
— Inside of it was a small daypack, highly compressed to fit against my laptop case


Health
— Most of this fit into one ziplock bag

two granola bars (if camping, you may want to bring salt)
water bottle
hand towel
travel bowl (silicone)
deodorant
contact lenses & solution
glasses case & cleaner
extra nosepads
nail clippers
sewing kit (tiny)
antibiotic cream
anti-itch cream
band-aids (held in a paperclip)
shampoo (tiny 1oz)
toothpaste (tiny 1oz bag)
hand sanitizer (tiny 1oz)
floss
lip balm
tiny comb


Tech
— While this may seem like a lot, 90% of it fit into one single-quart ziplock. (My only regret here is that I brought the shaver.)

MacBook Air (inside neoprene case)
1TB backup hard drive
electric shaver
cell phone & charger (both tiny)
iPod USB charger (& headphones)
Fujifilm S6000FD camera
AA battery charger (for camera)
Kindle (& usb cable)
Portable USB battery
2 short usb cables
tiny bundle of twine
USB thumb drive
2 sharpies


Clothes
— Happy with the balance I got here. Even though I only used the sleeping sheet once, it was nearly weightless — a notable bonus of getting a silk one. (Also, since this was winter, I needed to bring more clothes than if it were another season.)

6 T-shirts
2 pants (ALWAYS bring when camping)
1 winter cap/hat (preferably with a brim)
5 briefs
5 pairs of socks
1 fleece
1 thin pajama shorts
1 silk sleeping sheet

NOTE: ALWAYS consider bringing a rain jacket.

How to Do an Inventory Post-Mortem

Brutal honesty with yourself is the only way to come to a travel packing list you feel good about. And returning home from a trip is the perfect time to do it.

Sit down and go through what you’ve packed. Did you use everything? Is there anything you wanted to use but didn’t? Why not? Is there (and this is a big one) anything that you repeatedly bring and aspire to use, but never end up using?

By asking yourself these questions, you can save yourself time (and weight!) during your travels. Is there anything that broke (like my scissors on Maui) that you need to replace? Is it necessary to get it now or is it optional? (Odds are, you aren’t going to the Sahara, and scissors are available for purchase at your destination.)

In the past seven years, I’ve done this process dozens of times, shedding a lot from my list, such as a paper journal (now I do everything on the iPod), a flashlight (the iPod’s LED is blinding), and even duct tape! (Crazy, I know, but it’s situational.)

Constant reflection and striving toward less and less is an ideal I’ve held for many years, and only through this process of Optimus Minimus can I reach the happy medium I desire. (Think of it as Kaizen for minimalism.)

What would you change?

Experience has been the best teacher here, and I’m happy to say that I used everything I brought except the tiny comb, tiny bundle of twine, my USB stick, and the sharpies. Considering that they’re all small and light, I’d say that’s a win.

In the future, I’m going to leave the comb, one of the sharpies, and probably one of the t-shirts at home. But alas, it’s hard living with only 5 shirts sometimes. (And when you’ve been cultivating a weird T-shirt collection for as long as I have, you grow to miss it.) Honestly, the only thing I really missed in 3+ weeks of travel was my own hairbrush. (My hair was getting long at the time.)

In retrospect, what I’d love is a single charging solution for my iPod, Kindle, and camera. The camera is probably a lost cause since it runs on AA batteries, but I’d love to find a good solution to provide the correct amperage to my iPod, Kindle, and shaver in a single, all-purpose plug. Is that possible?

If anyone has a clue, please let me know under “Leave a Reply” below.
I’d really appreciate it!

Good luck on pairing down your packing list, and until next time, keep exploring. 🙂