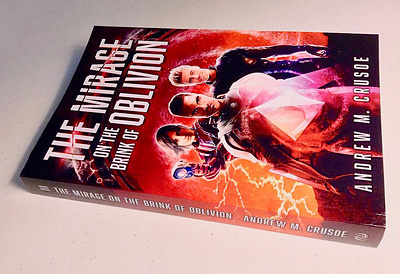
 Have you ever ordered a paperback proof from CreateSpace?
Many authors do this, and if it’s your first book, it’s a smart thing to do.
After all, you get to see if everything looks right before you put your book on sale, right?
There’s only one problem: on the last page, it’ll say PROOF in huge letters, effectively making it unsellable, even if it’s exactly what you want for your final product.
In short, if you’re reasonably sure that your proof will look like what you want to sell, there’s no reason to order a proof. Just order a final copy directly from CreateSpace. You can totally skip this step, which means you’ll actually be able to sell what you may have considered “test” copies before.
Here’s how:
- Upload your final interior PDF to CreateSpace
- Submit the book for review
- Once CS approves it, log back in, go to your book, and under “Review”, choose “File Review”
- Choose “Digital Proof.” There’s an option to download a PDF of the proof. (This is the same PDF that CS will print)
- Review the PDF carefully to make sure it’s exactly what you want to print
- Back at the “File Review” page, click “Approve”
- Now go to “Distribute” and click “Channels”
- Turn off every channel except CreateSpace. (You don’t want people ordering your book off of Amazon until you’re ready. This is key.)
- Click “Save” and then “Return to Member Dashboard”
- Under the list of paperbacks you offer, click “Order Copies” to the far right of the book you’re working on
- Go through the check out process. If you’re feeling especially confident, you may want to get 2 copies since it’s more economical when you add in shipping.
- When your book arrives in the mail, inspect it, making notes of anything you’d like to change. If there isn’t anything wrong with it, sell it! (If there is, use your own judgment, of course. Selling a subpar paperback will reflect on you as an author.)
These are the exact steps I followed when I ordered the test copy of the upcoming “The Mirage on the Brink of Oblivion” paperback. I’d used its basic template before and was confident that I’d nailed the design elements. And you know what, when the book arrived in the mail, it was just as I’d hoped.
The best part is, if I want to sell that copy, I can. There’s no ugly printing of the word PROOF on the last page; it looks beautiful. By doing this, I basically get to proof my book for free.
And when you’re ready to release your paperback, go back to the “Channels” area under “distribute” and turn on as many channels as you can. Then your book will show up in Amazon.
To clarify, you may not want to try this technique if this is your first paperback, but if you feel comfortable with the process, do it. In my experience, approved books cost the same as proof copies, so what do you have to lose? Just remember to turn off the other sales channels, otherwise you may be selling your paperback on Amazon before you’re ready! But as long as you follow the steps above, you’ll never have useless “proof” paperbacks lying around ever again.
Does this help you or give you new ideas? I appreciate on your feedback! Please comment below, or shoot me a message @hellocrusoe!
